|
|
Hi folks! Today we are installing a DVD Burner into Mark's PC.
If you try this at home, here is what you will need to complete this project:
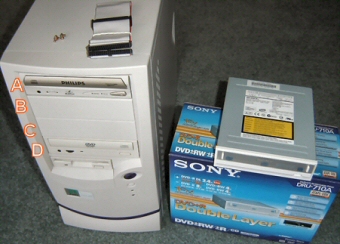
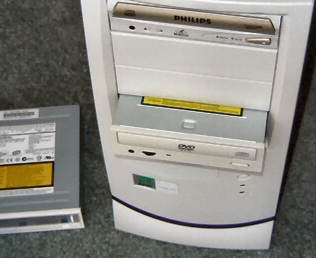
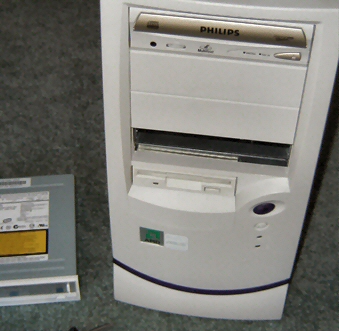
This computer already has an old DVD-ROM drive installed (labeled "D" in the Figure). We will be replacing that with a new Sony DRU-710A Double Layer DVD±RW drive. But the instructions we give below would work for a new install as well. For example, we could leave the old DVD-ROM in place ("D"), and insert the new Sony into either empty slot on this machine (labeled "B" and "C"), or replace our CD-RW drive (labeled "A"). Most PCs can handle multiple optical drives, so the choice is yours! |
|
|
Once you unpack the drive and find a screwdriver, you can finish the prep work by turning off and unplugging the power from your PC.
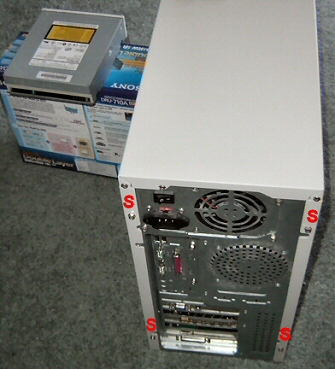
Next, remove the cover from your computer. On this machine, there are four screws that need undoing (labeled "S"). Your computer might be different. For example, most newer Dell Desktops have latches securing the cover. Whatever your situation is, get that cover off so we can get in and do a little work. |
|
|
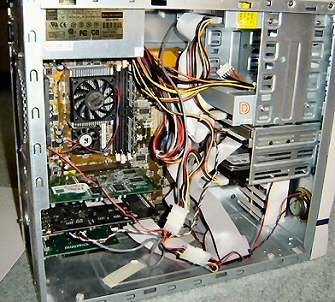
Here is a view inside with the cover removed. The old DVD-ROM drive is labeled "D" again.
Remove the cables from the old drive. I recommend taking notes on which cable goes where and at what orientation. |
|
|
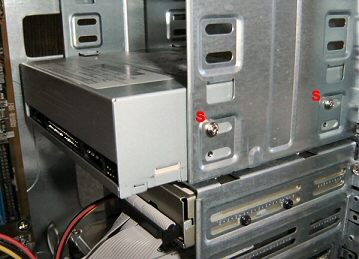
Before pulling out the old drive, you'll need to remove the screws that secure it inside the PC case (the screws are labeled "S" in this figure). |
|
|
Now slide the old drive out. |
|
|
With the old drive out of the way, we are ready to install the new Sony. |
|
|
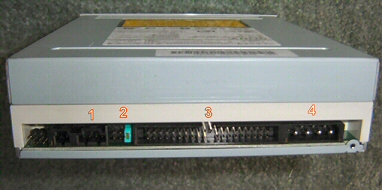
Before placing the new drive into the PC, take a look at the back of your DVD Burner.
There are four connections back there that we need to know about (labeled "1" through "4"):
|
|
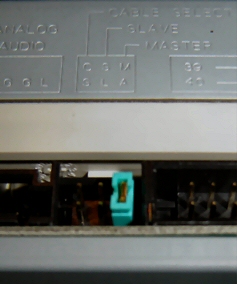
Setting the jumpers. When there is more than one drive connected to a cable, we need to specify which one is in control. One will be called the "Master" and the other is the "Slave". Since we are leaving the old CDRW drive in and connecting the new DVD drive to its cable, we need to specify which is Master and which is Slave. Take a look at the photo to the right. Notice that the blue jumper is inserted below where it says "MA" on the back of the drive. Thus, this drive will be the Master. LIkewise, we will set the CDRW as Slave (by inserting a jumper on the back of CDRW drive below the "SL" label). If you take a closer look, you will see another label where the jumpers go labeled "CS". CS stands for Cable Select. If both drives are set to CS, then the Master - Slave relationship will be determined automatically by the drives' position on the cable. We recommend specifying a drive as Master and the other as Slave rather than leaving it up to Cable Selection. If you install a drive on a cable by itself (no second drive on the same cable), you do not need to specify a Slave (choose MA or CS for the lone drive). |
|
|
With the jumpers set, we slid the drive into the empty bay. |
|
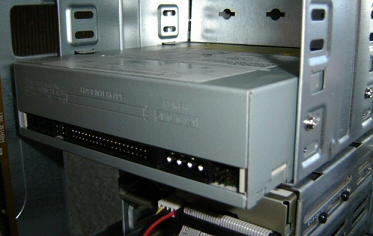
There is a view of the new drive seated in the computer after tightening it down with the screws (on the side of the drive). |
|
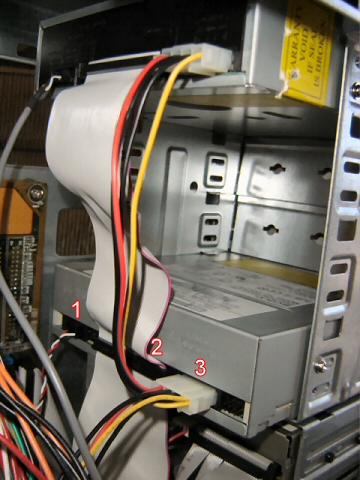
Time to attach the cables!
Here we have inserted the Adusio Cable, which will connect to the Sound Card (you might connect it to your Motherboard if your PC does not have a seperate sound card). |
|
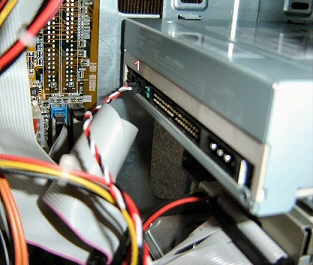
Connect the ATA/IDE ribbon cable. The red striped side go on the side where the power connecion is. |
|
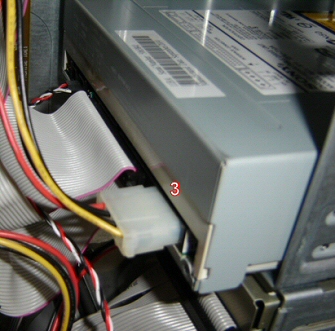
Next, attach the power cable. The plug and connector are shaped to fit together in only one way. |
|
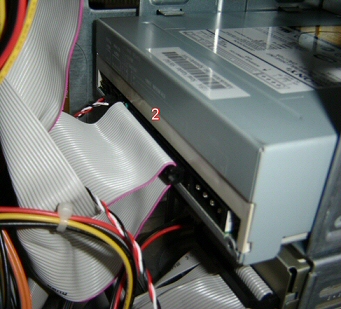
Here is a view after the three cables have been attached (1 is the audio cable, 2 is the ATA/IDE cable, and 3 is the power cord).
Notice also that the IDE cable is also connected to the old CDRW drive. |
|
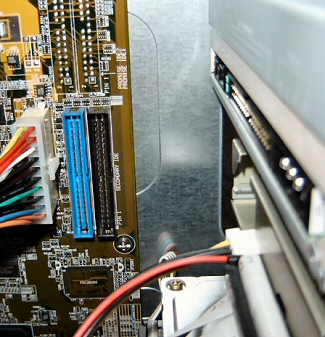
For those of you not replacing an old drive (a new install on a machine without an existing optical drive), your IDE cable will not already be connected to the Mother Board. In this case you need to locate the IDE slot on the Mother Board. In this photograph we see two IDE slots on our Mother Board. One is clue and the other is black. The blue one is the Primary IDE interface, and it is used for the primary hard drive. The Secondary IDE is typically used for a second hard drive or optical drives. So in most cases we would connect the DVD drive cable to the Secondary IDE interface. It is also ok to connect a harddrive and optical drive to the same cable and IDE interface (the hard drive would usually be set as the Master in this case). |


|
|
anewShop.com - Portable DVD Player Prices - Movie DVDs
|